
From Construction Chaos to Sparkling Clean: The Ultimate Post-Builders Cleaning Guide

From Construction Chaos to Sparkling Clean: The Ultimate Post-Builders Cleaning Guide
The contractors have packed up their tools, the scaffolding is down, and your dream renovation is officially complete. There’s just one problem: a thick, stubborn layer of fine white dust covers every single surface in your home.
Post-construction cleaning isn’t your standard weekend chore. Renovation dust gets into light sockets, inside sealed cabinets, and throughout your HVAC system. Tackling it requires a strategic approach so you don’t end up spreading the mess around.
Here is a step-by-step guide to transforming your building site back into a clean, healthy home.
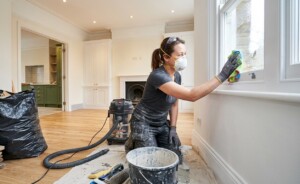
Phase 1: Preparation & Safety
Before grabbing a rag, set yourself up for success and protect your health. Construction dust often contains micro-particles like silica, drywall powder, and sawdust, which can irritate your respiratory system.
-
Wear Proper PPE: Put on an N95 or FFP2 dust mask, eye protection, and durable gloves.
-
Let the Dust Settle: Wait at least 24 to 48 hours after the builders finish before doing your final deep clean. Dust suspended in the air takes time to land.
-
Ventilate the Space: Open windows to keep air moving, but turn off your heating or air conditioning so dust isn’t pulled into the ductwork.
-
Gather Heavy-Duty Equipment: Standard household vacuums can burn out their motors when clogging on fine plaster dust. Use a vacuum fitted with a HEPA filter or rent a heavy-duty shop vacuum.
Phase 2: The Dry Clean First
The single biggest mistake people make post-renovation is applying water too early. Adding liquid to fine drywall or plaster dust turns it into smeary mud that dries back into a chalky haze. Always dry-clean before wet-cleaning.
-
Sweep & Vacuum Everything: Use a soft-bristle broom for large debris, then vacuum all floors, skirtings, and window sills using brush attachments.
-
Dust High to Low: Gravity works in your favor. Start at the top of the room and work your way down so falling dust lands on uncleaned surfaces.
-
Use Microfibre Cloths: Dry microfibre cloths carry a static charge that attracts and holds fine powder far better than cotton rags or paper towels.
Phase 3: Top-to-Bottom Deep Wipe Down
Once the bulk of the dry dust is removed, move on to damp cleaning to capture remaining residue.
1. Ceilings, Walls, and Trim
Dust collects on vertical surfaces just as easily as horizontal ones.
-
Vacuum walls using a soft brush attachment.
-
Wipe down walls with a damp (not dripping wet) microfibre mop or cloth. For painted walls, clear water or water with a few drops of mild dish soap works best.
-
Pay special attention to crown molding, baseboards, door frames, and switch plates.
2. Windows and Glass
Builders often leave behind sticker residue, plaster splatters, and paint flecks on glass.
-
Scrape off dried paint or plaster using a plastic scraper or a razor blade held at a 45-degree angle (keep the glass wet to prevent scratching).
-
Clean window tracks with a stiff brush and vacuum out the grit.
-
Wash the glass with a standard glass cleaner or a water-and-vinegar solution.
3. Cabinetry and Joinery
Dust sneaks into closed spaces through minute gaps.
-
Vacuum inside all drawers and cabinets, working from the top shelves down.
-
Wipe down the interior surfaces, door fronts, and cabinet tops.
-
Don’t forget the tops of hanging light fixtures and ceiling fan blades.
Phase 4: Flooring Care
Floors take the brunt of the construction traffic. Treat them according to their material type:
-
Hardwood & Laminate: Vacuum thoroughly with a hard-floor nozzle (no beater bar). Follow up with a damp mop using a wood-safe cleaner. Avoid excess water, which can seep into seams and cause warping.
-
Tile & Grout: Vacuum the tile, then mop with a neutral floor cleaner. If grout haze remains from tiling, use a specialized grout haze remover.
-
Carpets: Vacuum twice in perpendicular directions to lift dust embedded deep within the fibers. Consider renting a professional carpet extractor if heavy foot traffic left dirt behind.
The Ultimate Post-Build Checklist
Use this quick-reference table to make sure no hidden spot gets overlooked:
Final Step: Replace Your Air Filters
The final task—and perhaps the most crucial—is changing your home’s air filters. Your HVAC system likely pulled in dust during the construction process, even if vents were covered. Swapping old filters for fresh ones prevents recirculating construction dust through your home once the heating or cooling is turned back on.
Once the air filters are replaced and the bins are cleared, open the windows one last time for fresh air, sit back, and enjoy your newly renovated space!